Use Options to Make an App Your Own

When you run a PowerShift report or click the Prog opts button in an inquiry app, you can set program options that determine what data is included and how it is presented. Options enable you to customize reports and displays to meet your needs.

In most inquiries and reports, the options window looks something like this:

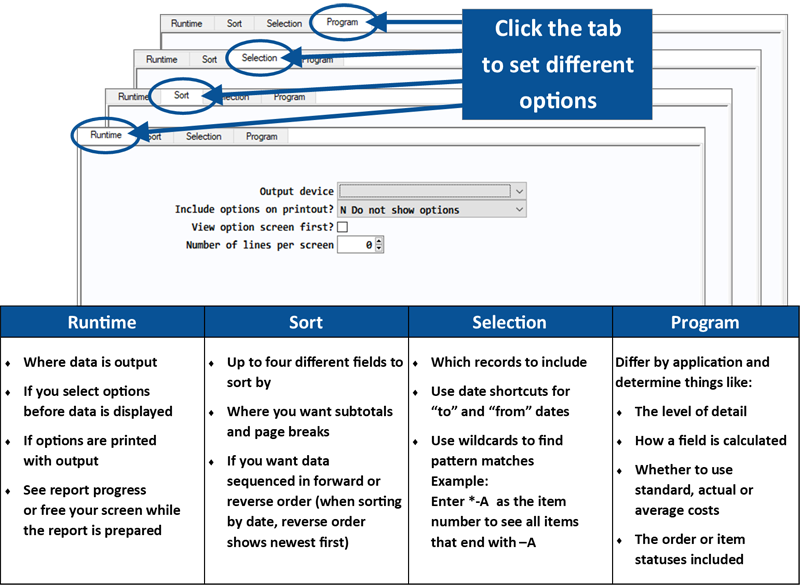
There are four types of options: Runtime, Sort, Selection and Program, accessed by clicking on the labeled tab. Not all programs have all four types -– and some have a second tab of program options (labeled Program2). In PowerShift 4.20, the Selection tab is active (i.e., displayed first) when you enter program options. (In earlier versions of PowerShift, the Runtime tab was active on entering options.)

Selection and Program options determine what's included in the inquiry or report and Sort options let you specify how data is sequenced and totaled. By changing options, you can get different information from a single app. For example, you could use Vendor Purchases Inquiry (VPQ) to see what POs are due this week, or to see last month's outside services, or to see all open POs for a specific vendor.

Since they have a lesser impact on data returned, you might overlook Runtime options. Options on the Runtime tab basically control how and where data is output.

The most common Runtime options are:

Output device
This is where the output goes when you click Print. You can output to email, a file, a fax device, printer or spooler, provided these devices set up in Output Device Maintenance (XDM).

Include options on printout?
You can include the options you selected when you output to a printer, spooler or email with a PDF attachment. Options can be printed as a separate page or at the top of the first page of the report. They look something like this on your printout:

View option screen first?
If you like to review or change program options before data is displayed in inquiries, this is the option for you! If you don’t view the option screen first, saved options are applied to the display -- and you can always click Prog opts if you need to change something. (This one isn’t applicable to reports since report apps always display the option screen first.)

Print report in background?
This option is especially useful for reports and GL registers that take a while to process. After you click Print, the program returns to the PowerShift menu so you can do other tasks while the report is generated in a background process.

Number of lines per screen
PowerShift allows very large sets of data to be processed and returned quickly. It is recommended you leave it set to 0 (zero) so that all records are returned. Rather than changing the number of lines, use Selection options to reduce the amount of data an inquiry returns. For example, you rarely need to see more than a year's worth of transactions in history inquiries (e.g., MHI, LHI), so set the "from" transaction date to -365 and the "to" date to T (today); in the GL Transaction Inquiry (GTI), it might make sense to save options that limit the display to entries made in the last 30 days. You can always click Prog opts to change the timeframe.

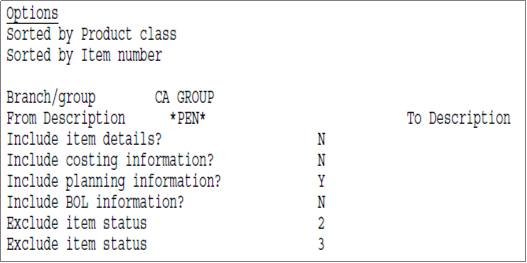
Program options determine what data you see and how it’s presented. So, if a report or inquiry doesn’t show you what you expect, be sure to check how your options are set!